
Astro Power Steering Conversion
|
Tech information furnished by Todd Ballard I enjoyed doing this conversion. This was very surprising because I really did not have fun installing the saganaw steering gear in front of the crossmember. My Cruiser is kind of unique so anything might be different for your application. However, there was very little information on the Astro box when I did this, so Im hoping others might at least be able to get some ideas from this page. The first thing you have to do is find a donor Astro Van. Im sure your neighbor will never figure out it was you that stripped his van in the middle of the night. A pick and pull might be safer though. Most Astros came with 4.3L V-6s. This is fortunate for us CSB fans as everything on the front of the motor is the same. In fact, if you just want to do the serp belt, most any 5.0L, 5.7L or 4.3L equipped car or van from the 80s will do. One with a lot of power accessories will have the biggest alternator. Drain the coolant and the p/s fluid. It is, of course, best to evacuate the A/C system with the proper recovery system, but youre at the pick and pull so do what you have to. The bolts that secure the doghouse come through under the hood. It is probably easier to get the support brackets on the back of the alternator and the A/C compressor from inside. Pull the A/C, alternator, water pump and upper radiator hose. You dont need the water pump. Any water pump will work, but it needs to be out of the way. You can pull the four bolts that hold the fan on, or just leave it on the water pump when you pull it off. Pull the lines from the back of the p/s pump. Dont cut the high pressure line. Youll have to pull the upper radiator shroud as well. Pull all of the bolts from the giant mount that holds everything. There are a few bolts down low by the oil pan that are easy to miss. Save all of the bolts. I didnt have to pull the radiator. YMMV. The Astro has a lot of room in front of the engine for a van. In fact, I can tell you from first hand experience that a 350 fits right in the cradle with plenty of room to spare. Pull the crank pulley as well. You dont need the harmonic balancer, so you dont need a puller. Pull the main bolt, and the outer bolts and tap on the outer pulley, itll come right off. Separate the pittman arm at the center link. You probably wont use it, but its easier than separating it at the sector shaft now, and you might use it. Pull the little bolt from the steering column up high. Save the slip joint and the u-joints. Pull the three bolts from the steering box where they come through the frame. Save these bolts, youll use at least two. They are grade 8 and tapered at the point. If you are not doing the serp belt, pull the hoses at the pump and get the hose-to-pump adapter. It is a 1 nut that threads into the pump. Astros use late model high pressure fittings with an o-ring. If you have an earlier p/s pump it will work except for the hose. You can get a custom hose with different fittings at each end, or you can just grab this fitting and thread it into your pump. Stop at the hardware store and get a 24 chunk of ½ pipe, a 7/8 hole saw and I used some ¼ angle iron, but I think most folks wont. Youll see what Im talking about in a bit. Pull the left fender, bib and radiator. You could do it without, but why? Pull everything off of the front of the motor. Install the serp belt system. You can leave of the whole A/C part of the bracket and get a belt for a non-A/C astro, or leave it on and install a second alternator, on-board air, or even A/C in its place. I plan on putting a second alternator there and using it for a welder and perhaps to power a 110v ac compressor. There is another spot below the A/C for yet another accessory, but it is pretty snug to the battery tray. 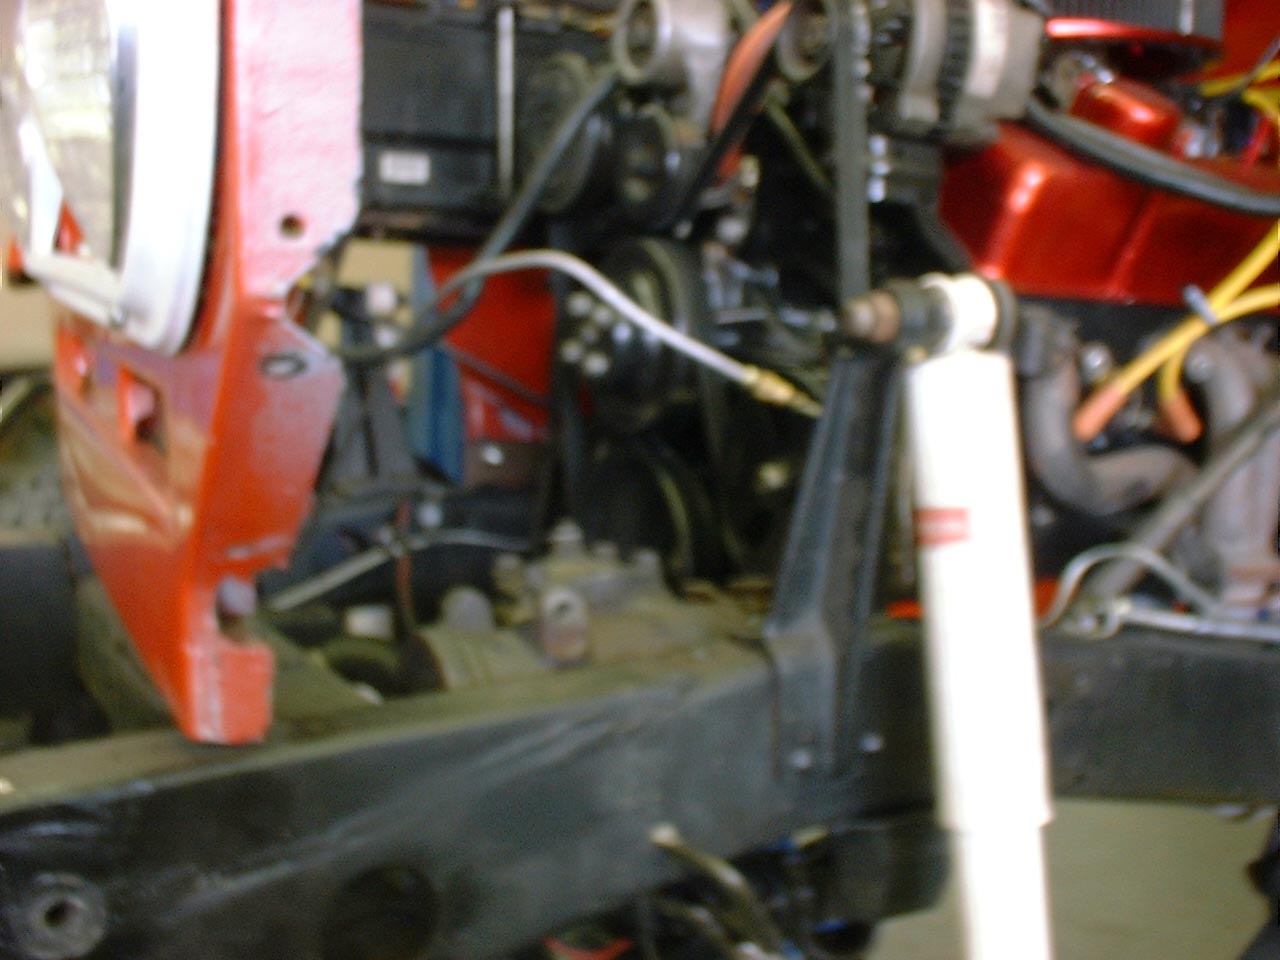 I used two big welding clamps to line up the gear box. I
cut the radiused corner off of the cross member to clear the p/s box. I lined
up the bottom two bolts as close to the bottom of the frame as I could and
still reinforce the bolts with the ½ pipe. The frame dips down right there and
gives a very slight upward angle to the gear box. This is a good thing. There
is a little bit of frame that sticks out. I ground this off, but in retrospect
I could have left it on.
I used two big welding clamps to line up the gear box. I
cut the radiused corner off of the cross member to clear the p/s box. I lined
up the bottom two bolts as close to the bottom of the frame as I could and
still reinforce the bolts with the ½ pipe. The frame dips down right there and
gives a very slight upward angle to the gear box. This is a good thing. There
is a little bit of frame that sticks out. I ground this off, but in retrospect
I could have left it on.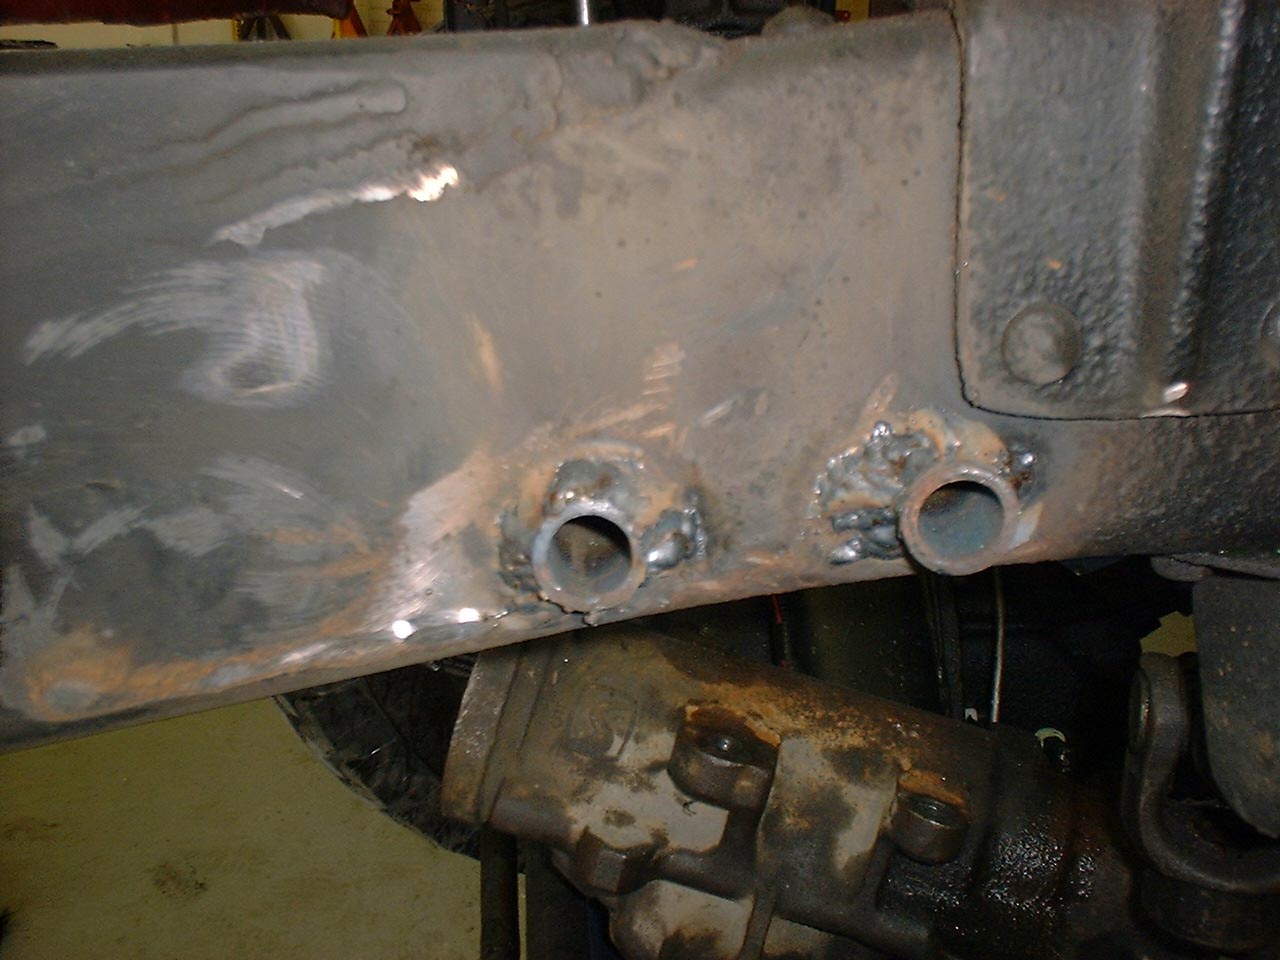 I got it all lined up, then marked where the holes should
be and cut the first one. I ended up hitting a rivet inside the frame because I
cut it so close to the bottom. I just cold chiseled the head off. I used the
7/8 hole saw and cut all the way through both frame walls. Some folks that
really abuse their rigs might want to make a spud plate with welded on spacers,
but I ran the pipe all the way through and used it as a spacer. I got it all lined up, then marked where the holes should
be and cut the first one. I ended up hitting a rivet inside the frame because I
cut it so close to the bottom. I just cold chiseled the head off. I used the
7/8 hole saw and cut all the way through both frame walls. Some folks that
really abuse their rigs might want to make a spud plate with welded on spacers,
but I ran the pipe all the way through and used it as a spacer.I then promptly cut the second hole in the wrong place. Doh! I was able to make the hole oblonged to line up, but I should have drilled through with a long 1/8 bit first to make sure, then followed with the hole saw. I then put the bolts through the pipe and snugged them down against the gear. I could then line it all up and tack weld the pipe in place. Then remove the pump and weld it in very solid. Reinstall the bolts nice and tight. The stock bolts fit nicely here and have grade 8 washers too. 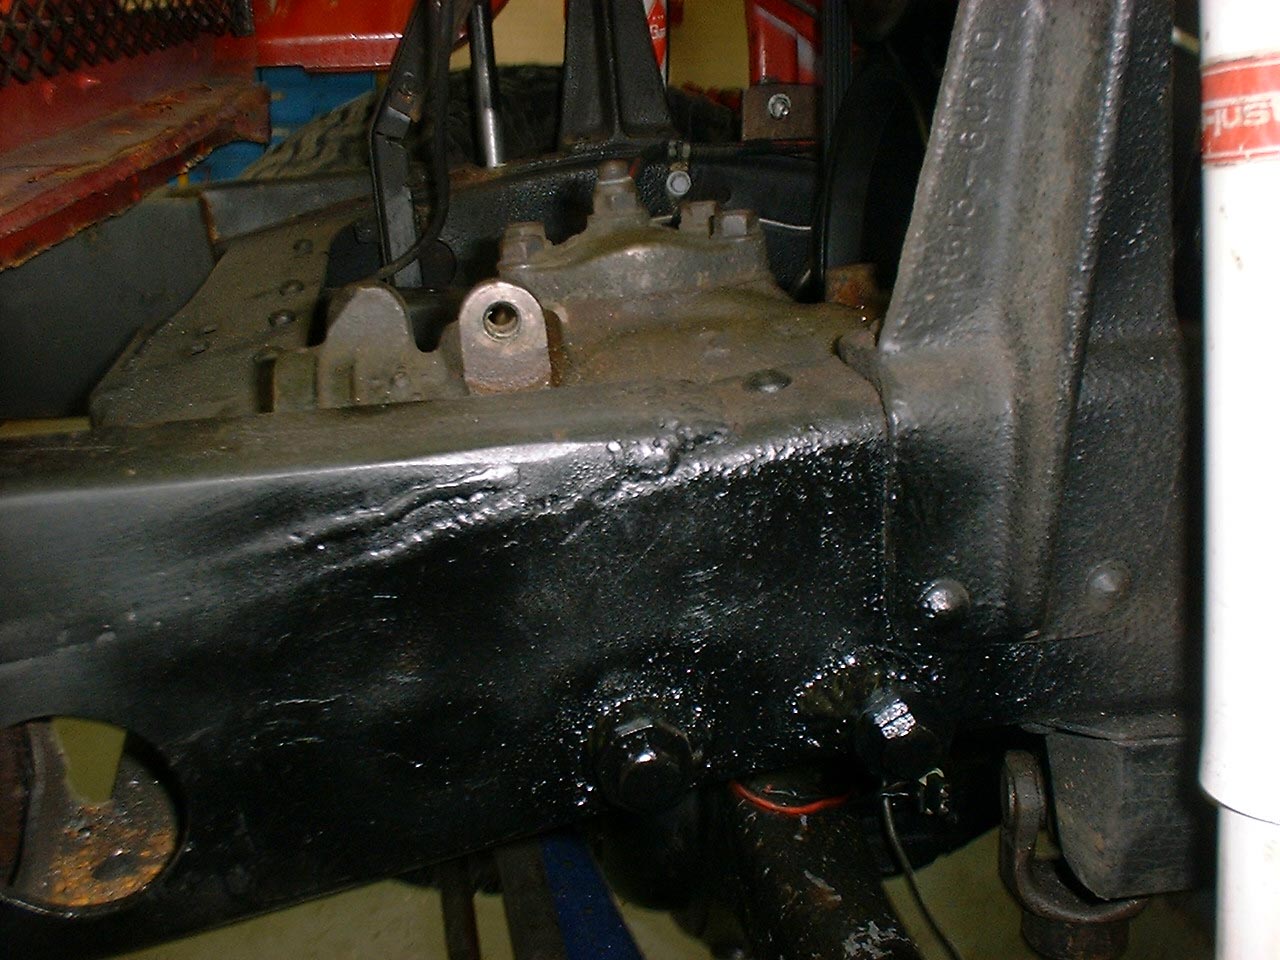 The top bolt is about 1 above the frame. A spud plate could be used as could a triangulated-braced angle iron. I used the ¼ angle iron welded both sides to the frame. Then I put another chunk of ½ pipe in the cradle formed by the angle and welded it in solid. The big difference is I have squared off the tops of my frame rails so it was flat there. Yours will probably be angled. 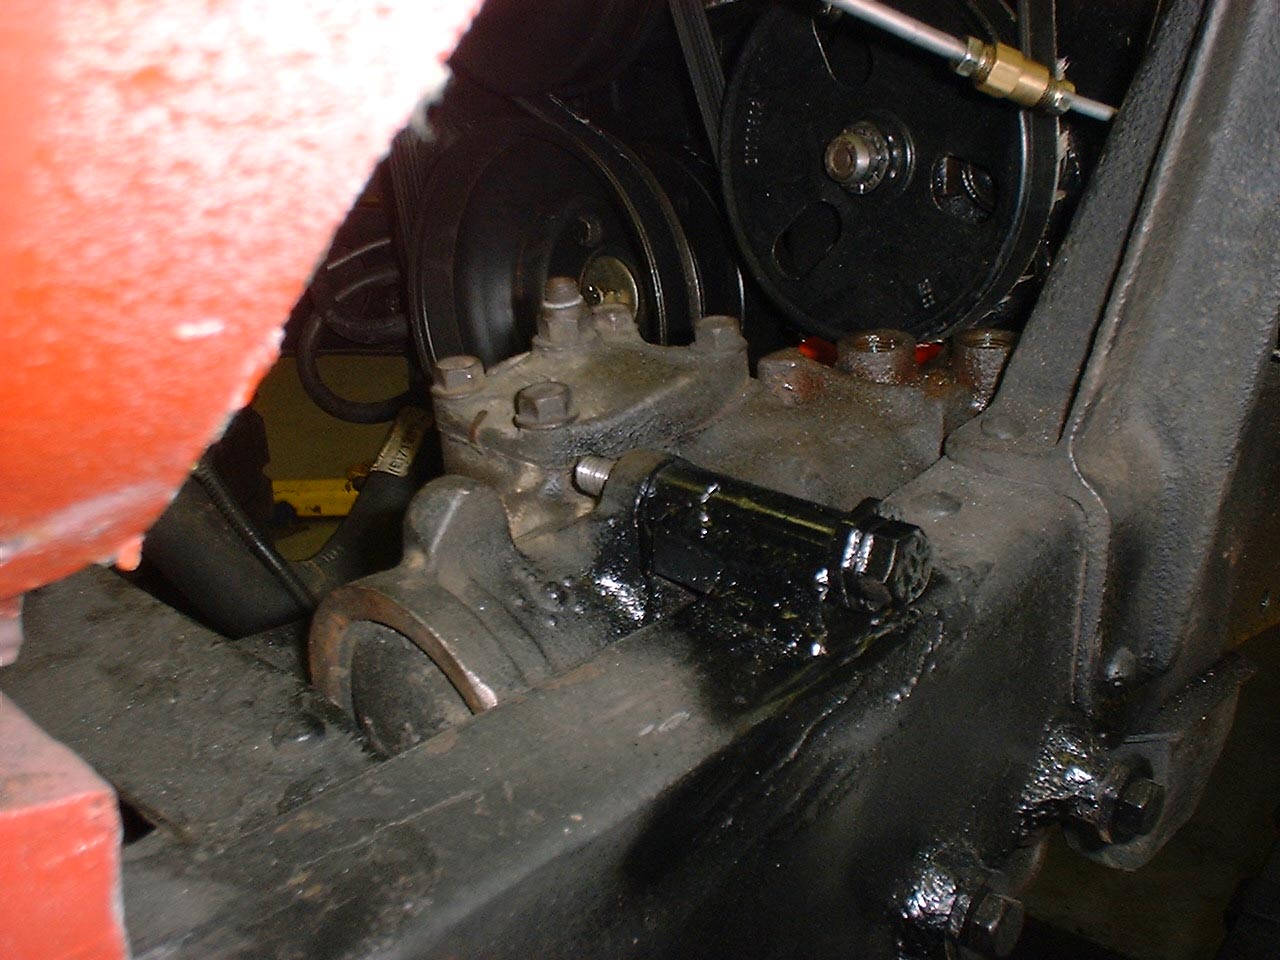 The input shaft is splined to a ujoint rather than a rag joint as on most GM applications. This gives a lot more clearance, but the joint is kind of small. Im using it right now. Well see if I need to upgrade. The other part of the u-joint is a double D shaft. It is the right size for most late model and import steering shafts. It fit nicely on my mini truck shaft with little modifications. It should move a inch or so, but not come off without removing the column or the box. The radiator is a tight fit on the box. There is a big lug on top of the box that seems to have no purpose. I think it can be ground off. The radiator support frame can also be notched. There is a good two inches before the bottom tank of the radiator on that side. Mine needed neither modification because I have a 2 body lift and an electric fan. I just put two chunks of 2 square tube under the radiator support. The support bolts through the top and new bolts through the bottom of the tube and through the mounts. It actually clears my water pump much better now. I used a drop pittman of unknown origion. I am looking for a Cherokee pittman I bought for the saginaw conversion and couldnt use because it was too short. It might work now that the box is much closer to the correct position. E-mail me and Ill let you know if it fit. The relay rod is about 2 inches forward of the tie rod with the arm I have now. The stock Astro arm will work if you placed your box with the holes below the frame, although, again, the throw might be too short for the wheels to turn all the way. The one I used was pretty long and had about a 1 drop that cleared the front cross member nicely.  Put the lines on. The Astro lines can be used, but arent the best fit. I dont know what application will fit better yet. Put the fender and the bib back on and hook the lights and horns back up and youre good to go. No more Armstrong steering or no more sag box hanging out in front. No more tightening 3 or 4 belts. One with a self tensioner is much nicer. One 5/8 wrench will pop your belt on and off.  All around I think this set up works nicely. Hope it gave you some ideas. Todd Ballard ~ tballard2000@yahoo.com Posted June 12, 2002 |