Anyone who owns a Toyota knows about the birfield and its infamous "tink" sound when one uses the skinny pedal in a tight situation. Then you have to unlock your hubs and get to a flat spot to start the birfield removal process. Those who are veterans at the removal process know it like the back of their hand. And then there are the people like myself when I was faced with the situation with a broken axle shaft and not knowing a single thing on how to remove a birfield. It was good thing I was with my TLCA club the Cascade Cruisers to aid me on the removal process.
This article is is a fairly indepth set of directions on how to remove a birfield in your own garage so when you came to face to face with the "tink" sound you will not panic but know what to do. The removal process is not as bad as one thinks, just messy and time consuming the first couple of times.
|
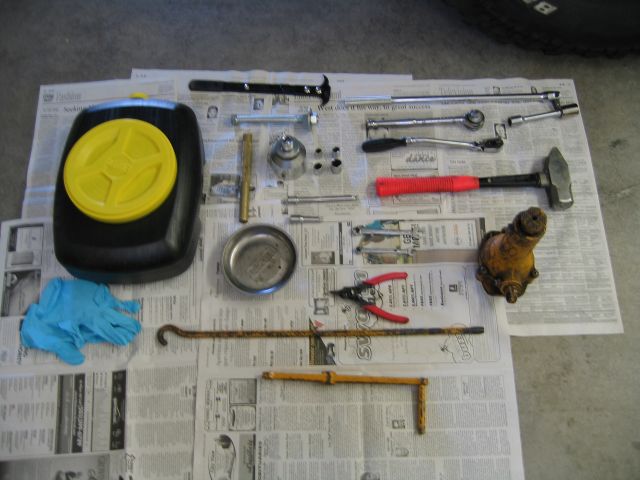 The tools you will need are:
- A bottle jack or floor jack
- Breaker Bar
- A 3/8" socket wrench with adaptors for larger socket sizes
- 10mm, 12mm, 14mm, 17mm, 13/16", and 2 1/8" sockets
- 10mm and 12mm wrenches
- 3lb hammer (mandatory in my book)
- A Brass drift
- Snap ring pliers
- Inner axle seal puller
- Inner axle seal drift
- Gloves
- Oil drain pan
|
First you will have to loosen the lug nuts on your tire first and then using your floor jack or bottle jack to lift the axle up to remove the tire.
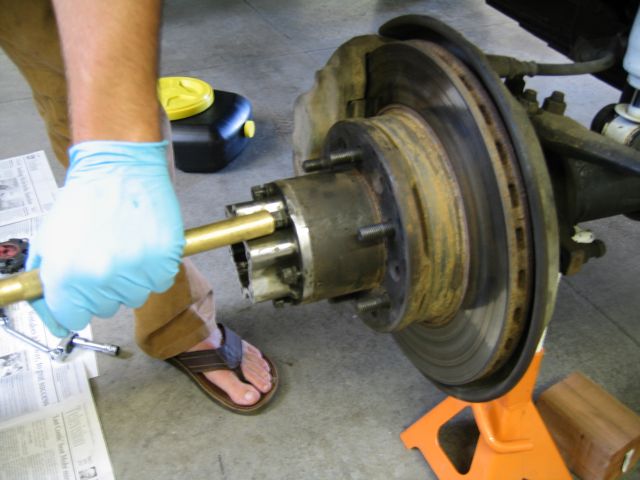
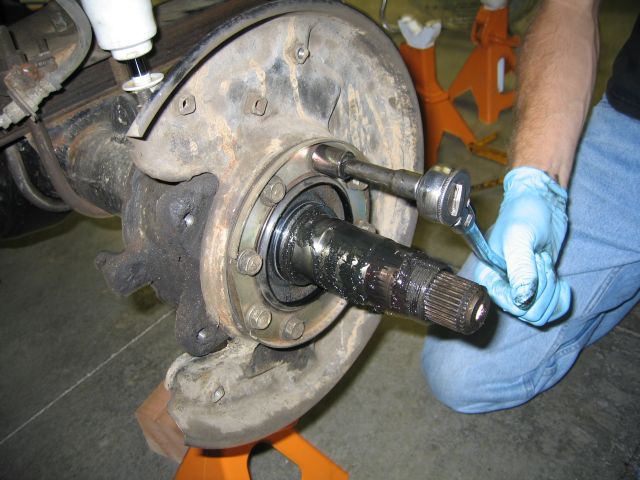
Next is the hub removal. You will first be removing the hub plate with your 10mm socket. Next you will take your 12mm socket and loosen all the nuts all the way to the end of the studs but do not remove the nuts all the way just yet. You will take your brass drift and your 3lb hammer and hit every stud with the nut at the end to loosen up the nose cones on the hub.
*Note what is not shown in the picture is the snap ring at the end of the birfield. If this is the first time the hub is coming off you will need your snap ring pliers to remove the snap ring from the end of the birfield shaft.
|
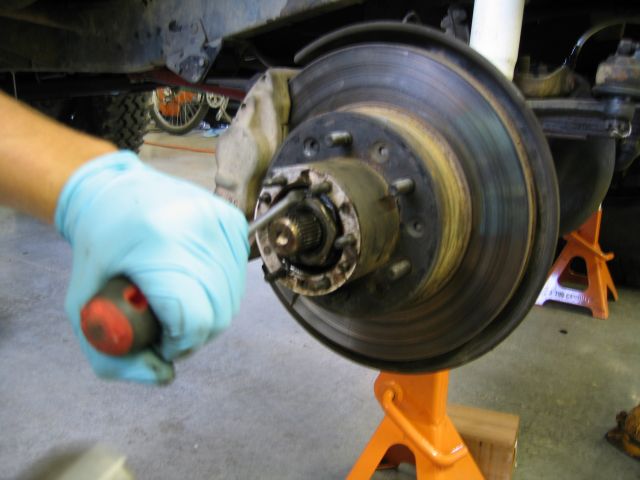
Once the hub is removed the next thing to do is to take a flat head screw driver and your 3lb hammer and un-bend the locking washer from the 54mm nut. After that is completed take your 2 1/8" socket and take off the 2 54mm nuts and the bearing that goes around the spindle.
|
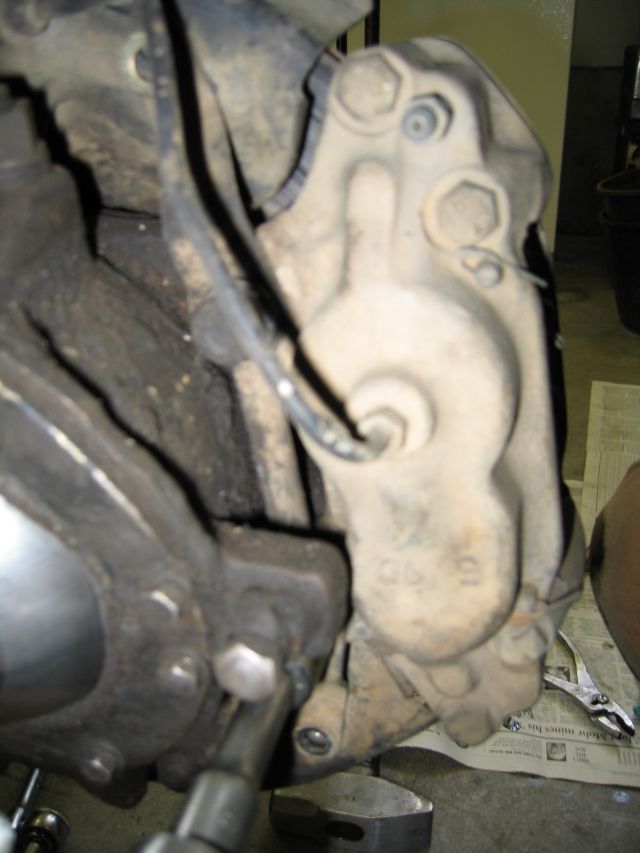
Next on the agend is to remove the brake caliper for the rotor. You will need your 12mm socket for the very top and bottom bracket. After that you will take your 14mm socket and take off the brake caliper bolts. Once the brake caliper is off gently lay the caliper on your leaf spring.
|
Now it is time to take off the spindle itself. You will be using your 14mm socket and simply remove all 8 bolts.
|
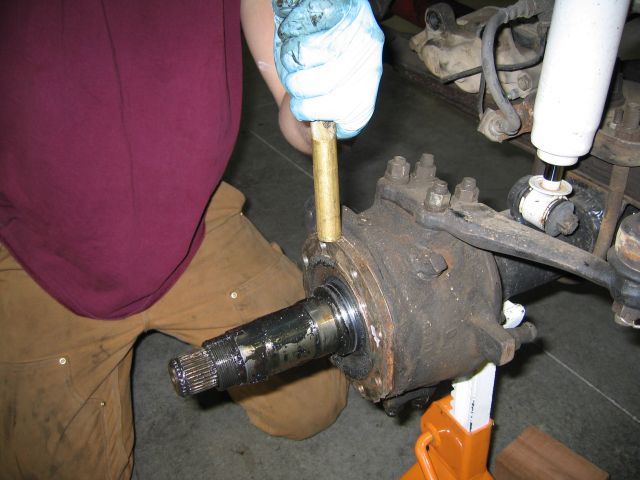
Depending on how stubborn the spindle is you might have to use your brass drift and 3lb hammer and give the spindle a "little" nudge to come off the knuckle. After the spindle is loose simply slide the spindle off the birfield shaft.
|
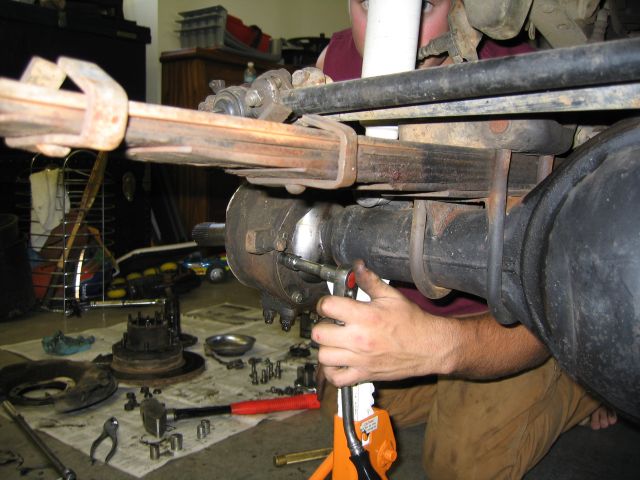
Now that the spindle is off you will be taking off the knuckle gasket on the backside of the knuckle. Simply take your 10mm socket and remove all 8 bolts.
|
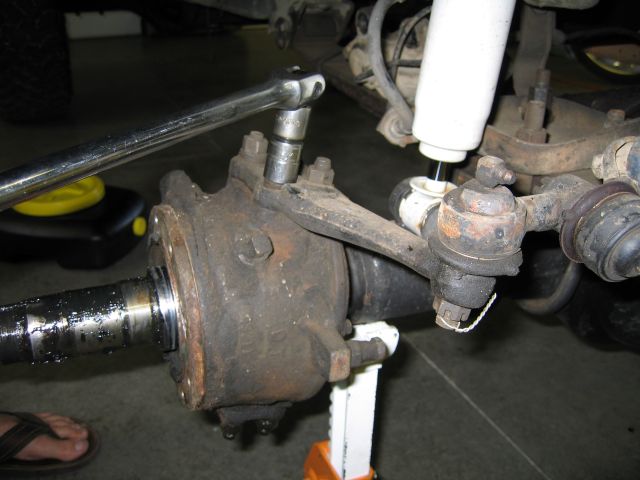
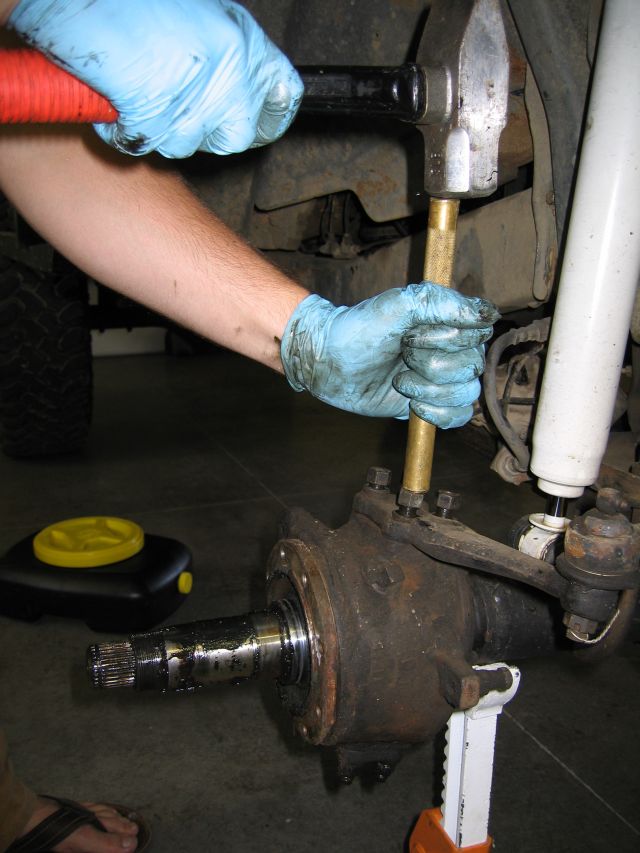
Now that the rear gasket is away from the knuckle you will now need to remove the steering arm. It is the same procedure as taking off the hub with loosening the the nuts with your breaker bar with a 17mm socket and loosening the nuts all the way to the tip of the stud. Then you will be using your brass drift once again and the 3lb hammer to loosen up the nose cones that are in the steering arm. Once the nose cones are loose remove and lift up on the steering arm.
|
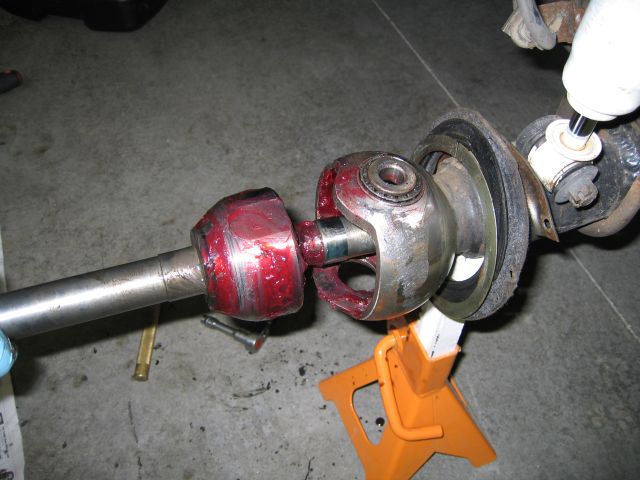
Simply lift up on the knuckle assembly and pull back towards your body making sure that the trunion bearing stays inside its spot. My personal trick for extracting the birfield is to jack up the other tire and lock the hub and spin the tire till the flat spots on the birfield are verticle. If you do not have a locker like I do then simply rotate the drive shaft till the flat spots on the birfield are verticle and then simply pull out.
The proces for re assembly is exactly the reverse. Happy wrenching and learn to remove a birfield in the comfort of your garage instead of being knee deep in the mud!
|