EZ-Lock / Lock-Right install instructions.....
Demonstrated March 2001
NOTE: This installation was done as a bench install. The rear locker can be done with the center section in the truck, the front install requires removing the center section. For this writeup, we assume it's in the rear axle.
Tools Required:
Procedure:
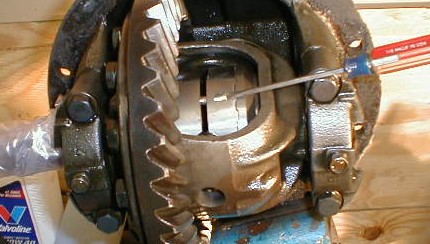
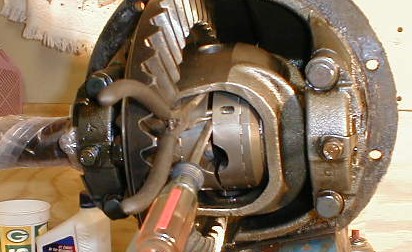
Position the axle of the truck securely on jackstands and remove the wheels/tires. If you have rear disc brakes, the calipers will need to come off as well. Using a 7/8" socket or wrench, remove the fill plug and the bottom drain plug on the axle housing and catch the used oil in a suitable container for later disposal. If the bottom plug will not come loose or is too damaged due to rocks, etc. you can remove the lowest diff cover bolt (14mm) and stud and drain thru there. Once drained, remove the rear diff cover. Some folks will just remove the cover to drain as well, however this can get a tad messy.With the diff drained of oil and the cover off, remove the retaining bolt for the crosspin (12mm). With this out, carefully remove/tap free the crosspin and remove the center block. You can now remove the two spider gears. With these out of the way, slide both axles inwards about 1/4 inch and remove the c-clips. Slide the axles out until they are no longer engaged with the side gears (@ 3 inches) and then remove both side gears.
(On a front axle, you will need to remove the lockouts, the calipers, the spindles, and slide out the birfields/front axles. You can then remove the front driveshaft and then remove the front center section and install the locker on the bench. Remember, there are no c-clips on the front axle to worry about and no center block.)
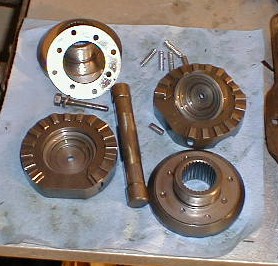 The image to the left shows all the parts of an EZ-Locker or the Lock-Right. The only difference I've seen between the two is the EZ-Lock uses tiny caps on the ends of the springs and the Lock-Right does not. Beyond that, both are nearly identical. Note the orientation of the c-clip retaining inside the inner gears. Also note that you need to reuse the original side gear shims. (It is recommended that you replace these since excessive wear on these two shims reduces the pressure on the locker teeth and can cause the locker to ratchet under load.)
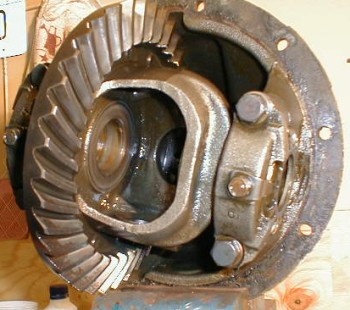
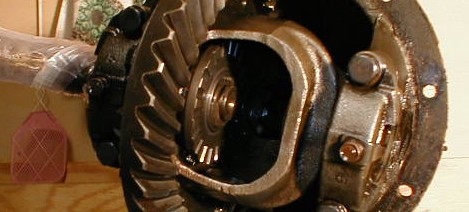
Image 3 shows the open carrier with everything removed and ready to begin the install. It's a good idea to wipe cleean any oil that's in there and to make sure the housing is also wiped clean. (BTW, there is no image 2...photo didn't turn out!)
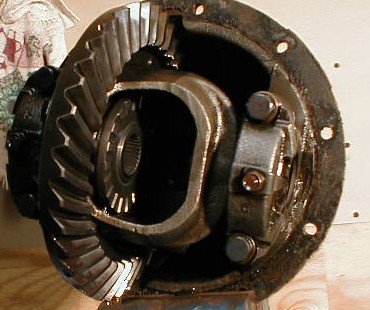
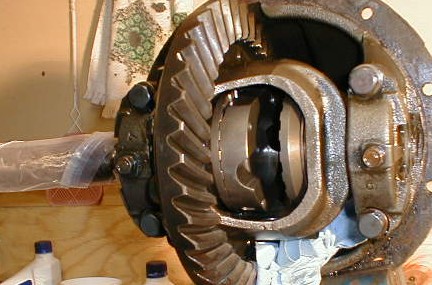
Image 4 shows the installation of the first side gear. Once this side gear is installed, you can now reinstall the long-side axle shaft.
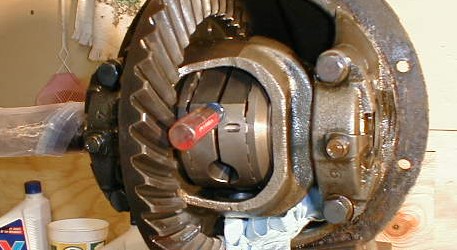
Image 5 (below) shows the installation of the long side axle with the c-clip in place. Once the c-clip is on, you can then slide that axle outwards to help hold the clip in position. (I usually end up rotating something shortly after this and the clip drops...)
Next, install the other side gear and slide the axle into place. NOTE: do not slide all the way in yet, just enough for the splines to match with the gear. You DO NOT want the end protruding thru the gear face yet. Install the 4 pins into the inner gears using a dap of axle grease to hold them...they are installed in the slotted holes and will be slid over once both are installed. Now install the drivers side inner gear as shown with the c-clip retaining cover installed. (see photo 1 above for its orientation.)
Now install the second inner gear - align so that the center pin grooves are aligned up s well. I place a screw driver inbetween as shown to keep them from separating. You now use the second flat-head screw driver to slide the pins from the inner gear with the slot into the holes on the other inner gear. The pins will protrude and help keep things aligned. After each pin is aligned, install the spring to help hold it in place and keep pressure on the two halves. Once 2 are done, the screwdriver is usually not necessary to keep pressure on them.

With all the pins slid over and the springs installed, it's now time to install the last c-clip. Slide the short side axle the rest of the way in and using a small screwdriver to separate the side and inner gear teeth....there is a flat-spot on the inner gear that also needs to be facing out. It's thru this slot that the c-clip is placed onto the axle end. This can be a tough spot and is usually the one thing that will drive me nuts...dropping the c-clip has caused me more than once to remove half the locker to find it in the bottom somewhere!
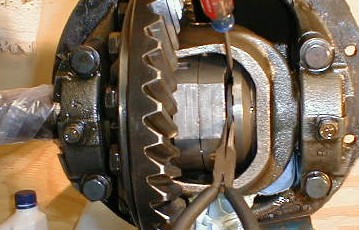
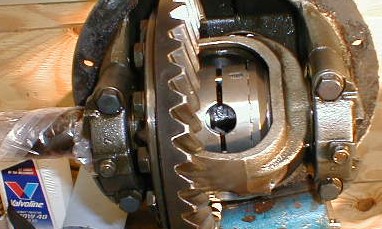
Image 10 below shows what the finished install should look like. The final steps are to reinstall the center pin and the retaining bolt, install the rear cover, and fill with some 80W-90 gear oil. All in all, it should only take about 1 hour for the rear axle and perhaps 1.5-2 hours for the front.
Photos 11 and 12 below show a couple of the tools I use for removal of the locker. The small screwdriver is ideal for popping out the springs. And by using the small screwdriver for pressure and finding a very small nosed pliers, you can then slide the pins over for removal. Careful with the springs...most of mine were bent on the first removal and had to be replaced. Also, they tend to pop out and you may find them clear across the garage....or you may not find them at all!