On-Board Air Installation
Conversion performed March 1999
NOTE: This installation uses an AC-Delco A6 compressor into an FJ40/Chevy 350
PARTS/COSTS REQUIRED:
NOTE: When removing the junkyard parts, take everything possible. You never know what pullys/belts/brackets you may need to get it all to work together. I already had the PS installed, but grabbed the pump anyways just in case the brackets were different (they weren't). If you aren't running PS now, it's a good time to at least have the pump ready for the day you install it.
SUPPLIERS:
* Fleet Farm - This is the local farm-style hardware store...they carry pretty much everything a real man would ever need to survive.
* Grainger - Their catalog is considered a bible by many manufacturing companies....they sell everything imaginable....they also have a local warehouse for me to poke around at. If they had a retail location, I probably would never have to shop at Fleet Farm (or anywhere's else for that matter).
PREPARATION:
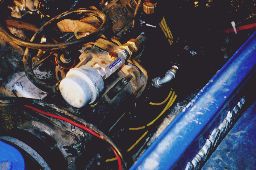
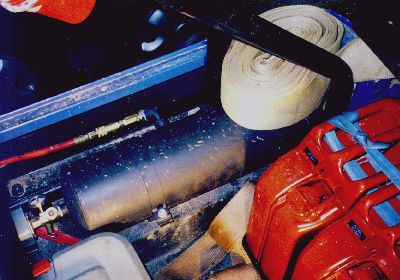
Begin by cleaning up the compressor and the tank. I mounted the tank on the rear fenderwell...that seemed to be the best place for me for accessibility and protection of the tank. I then mounted the compressor in the engine compartment using the factory brackets...unfortunately, Iwas unable to use the lower rear bracket since I run block hugger headers, but for occasional use, a 3 point mount should be fine. I used the compression fittings on the intake side and installed the inline oiler and filter. I removed the original pickup tube on the breather and installed a rubber valve stem in there with the actual stem removed...this allowed easy hookup of a vacuum line to the air cleaner for better filtration and water proofing.
I then installed the oil-water separator to the output line off the pump and ran a pressure hose back to the tank. At the tank, the manifold with the pressure switch and pop-off valve were wired in to a dash switch. This allows me to only turn on the system when I need air available.
Thus far I've been quite happy with the setup...I can easily air up tires with the residual air in the tank and have enough pressure to pop most tires back on their bead. I do add a bit of oil directly into the compressor each year to help ensure that it would seize up. My only change would be a different pressure switch, one with a build-in line unloaded, rather than the automatic one I purchased.