
IH8MUD Spring Over Axle - Front...
Leave your mouse cursor over each photo for a description.
The complete write-up and installation guidelines follow the photos...
(Jim Ridderbush is my official welder/fabricator when it comes to my truck...thus far,
he's done my entire tub, my roll cage, my skid plate, and now the axle housing
...and he's available for hire too!!)
All of these photos are full 640 x 480 and may take a bit of time to load....I kept them fullsize for clarity.

Parts required - costs associated:
The procedure for doing the SOA is more work than most realize. A lot of time is required for the conversion and getting things set exactly right takes some patience. Also, as I made various modificatations, I had to constantly make more minor changes to keep things working correctly.
Take measurements before starting.....tire to fender distances at all 4 corners, frame heights, etc....everything you think you'll want to know before starting to take things off.
Starting with the rear suspension, support the rear portion of the frame on jackstands just ahead of the spring mounts. Remove the tires, remove the shocks, disconnect the frame-to-axle brake hose, and support the axle under one u-bolt pad with the jack. Using a torch or cutoff tool, lop off the two u-bolts. With the leaf spring at a fairly relaxed point (adjust jack height), remove the nuts on the spring shackle and take off the shackle. You may have to torch/burn out the stock 20-year-old rubber bushings as they have likely seized themselves fairly permanently to your pins. Lower the jack once this end is loose and the spring should drop to the ground and the axle should no longer remain attached. To remove the solid-mount end, again remove the inner nut, remove both outer flange nuts, and combine a large slip-joint pliers, a large pry-bar, some unrepeatable words, and possibly some heat/fire to twist and pry and work this bloody pin free. Yes, these pins are by far the worst on the vehicle to wrestle with. Repeat to the other side.
You've now got a couple decisions to make. If your stock FJ40 suspension is like most, you're springs are fairly flat, which is good. Also, if you are like most, your rear shackle was pretty close to vertical, which is not good for travel or ride. See my page on relocating this mount to improve your flex and ride characteristics.
Your next decision is regarding the springs themselves. Most people open all the wraps for smoother spring movement and greater droop. (requires a prybar, some heat, and an attitude...) Some also decide to paint them...I used a graphite-based industrial paint on mine....nice slippery surface. Another option to consider is reversing the springs end-for-end to lengthen your wheelbase and address any possible driveline changes you may be considering. This will add about 3.5 inches to your wheelbase. Remember tho, this adds additional concerns to axle wrap and can complicate other changes as well. Also, reversing the springs means you should reverse the military wrap second leaf, which means disassembling the pack and re-drilling a center hole. Be prepared to junk a drill bit or two on this process. Also, many express concerns about weakening the spring with additional holes, so be forewarned.
Another option is the installation of FJ55 rear leaf spring packs instead of the FJ40 packs. FJ55 rear packs are about 3.5" longer and have a centered spring pin...both halves of the FJ55 packs are equal length and are the same length as the long side of a stock FJ40 spring pack. If you opt to reverse the rear spring packs, consider tracking down a set of these. This will also necessitate the relocation or reversal of the shackle mount to achieve the ideal 45 degree resting shackle angle. You can still expect to need a wrap bar, tho some claim it's not necessary....personally, for $100 and some design work, it's cheap insurance.
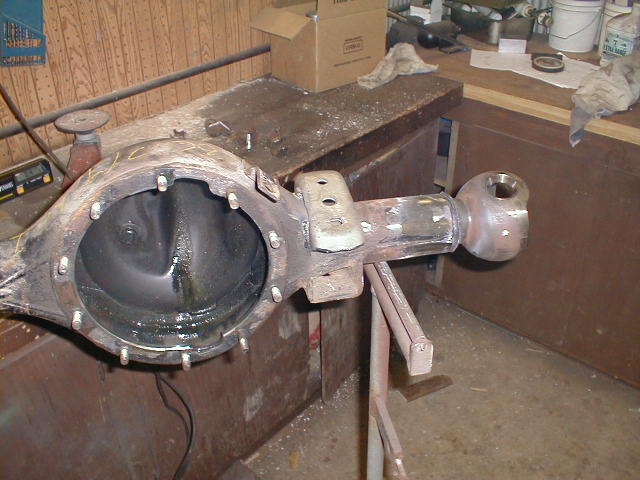
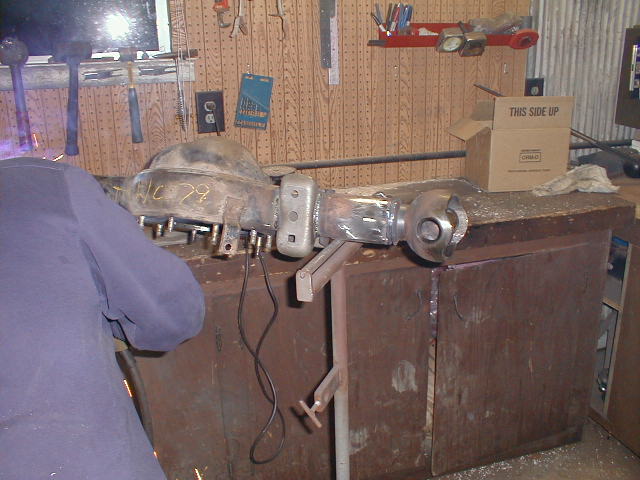
Once your spring work is all figured out and you have them cleaned, painted, re-bushed, and completely installed, you can now start with the rear axle placement. First off, make sure the hole in the center of your perches (I used Dodge perches) is sized right for the spring center pin. Slip the axle under the springs with the perches resting on them and begin lining things up. In order to accurately set your pinion angle, you must have the vehicle resting on the axle/springs and not on the frame....so support the axle on jacks stands and remove those currently supporting the frame. Now the question is pinion angle. If you point it directly at the transfer case, you really should plan on getting a double-cardan joint for the transfer-case end of the shaft. Otherwise the pinion should be parallel to the pinion output....a simple angle finder and some patience will get you the correct result. Also, check out some of the driveline shops on the net for info on angle.....Tom Woods has some good info, as do some others. You may need the driveshaft installed as well to get good measurements....if you opted to lengthen your driveline and reverse the springs, your rear driveshaft will be way too short....check the front one for length....sometimes you get lucky and it fits. Tack weld the perches into place, recheck everything a few times, call your buddies for their comments, bring the wife out to see your progress, and when everyone is happy, resupport the frame on jackstands, remove the axle, and begin welding the perches into place. Short stitch welds will distribute the heat better and lessen the chance of perch movement or axle tube warp. Also, while you're there, triple check to make sure you lined the new perches up with the old ones as far as left to right orientation....you'll be ticked if you find you set everything off to one side by 1/2 inch once it's all welded up. Once the new perches are on, torch off and grind clean where the old perches were....they are no longer necessary.
Rear shocks....you will need to create mounts on the axle for your shocks now....and if you opted to reverse springs or go with longer springs, you may need to rework the upper mount too. It will help to have your new shocks on hand when doing this.....personally, I would buy the longest shocks you can find (at least 13 inch travel) and create mounts to fit. Also, in the rear, running shocks at a 45 degree angle will not effect their damping ability, so don't be afraid to tip them inwards somewhat.
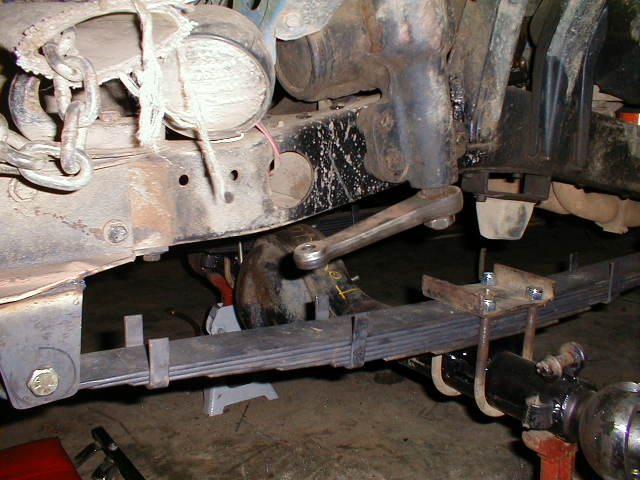
If you've decided to install a wrap bar right away, now is the time to take those measurements and at least get the axle-side bracket created and welded in place. Welding with the axle installed makes for some unpleasant conditions...trust me on this one...you don't need to have the bar done yet, just the intent to make one in the near future.
Reinstall everything, using new u-bolts and your old plates - torque to factory specs. Rear brake lines are your next concern....and the driveshaft. I was able to run the longest rubber hose from NAPA that they had and with a dropped frame-side mount, no length problems. I also happened to have a driveshaft in the garage that was the correct length, so in it went. Sometimes, you just get lucky.
Now the rear is done, so reinstall those tires and get the trucks weight back on the ground. Check that pinion angle yet again. And take a fender measurement and see how much lift you really added.....unfortunately, you probably have 31-33 inch tires and they will now look puny on the suspension....figure another $700 or more for a new set of 35036 inch rubber to get things looking proportional.
Now for the front....this is the fun side!!
There are two distinct schools of thought on the front axle....cut and turn the outer knuckles or just leave as is. Personally, I wanted to increase my caster angle from factory to compensate for the much larger tires, meaning this would tip the front pinion down another degree or two from stock. This worsens the front driveline angle, meaning I would definitely have to do the cut and turn. In my opinion, the cut and turn is a necessity. If you disagree, then just ignore that part of what follows.
Removing the front axle is mostly identical to what happens in the rear. So break out your jackstands, your floor jack, your tools and the torch, and get to it.
Now that everything is on the floor, the shackle reversal question raises its ugly head. The reversal claims better handling and does offer better approach angles. Leaving the shackle at the front give you worse approach angles and a greater chance of bent springs. Rear shackles means your front driveshaft compression characteristics need to be addressed closely to make sure the driveshaft doesn't take out your transfer case. Also, you will likely need some major shaft stroke.... Personally, I opted for the reversal.
The most common reversal uses the existing mounts on the frame and relocates them to the front. Since I was replacing an aftermarket suspension correction system, my mounts were already off and long-since lost. I had mine fabricated out of some 3/16" plate and had them drop slightly lower than a stock mount would have. I went with a lower front mount since I was using FJ55 rear springs (longer) in the front and knew that would move my rear shackle further down the frame. Once those were fabricated, I took measurements of the factory axle perch distances and triple checked everything to make sure they were aligned equally. I also took measurements with a spring installed in them to ensure my front-to-back location was correct and that I wasn't going to find my front axle in the wrong position with the springs installed.
Once the fronts are completely mounted, you can begin determining the location for the rear shackle mount. I used a simple piece of tube with the same ID as spring eyes and cut it to length. I then used a magnetic drill press to accurately drill a straight and consistent hole thru the frame on each side. (Try and shoot for those shackles at a 45 degree angle again.) You can do it by hand as well, but it's not nearly as easy. Now is the critical part....aligning these new sleeves in the holes and getting them parallel....if they are off too much, you will thrash spring bushings in short order! I used a broom handle that just fit inside the pin combined with some careful measuring to get things aligned. Ideally, you have the motor out and can run a handle thru both side go get them the same.....however, few people are willing to drop a motor out for this process. Take your time, and measure lots. You should be able to get it close. (I put the weight of the truck on the springs and used a 1" block of wood between the springs and the frame to guesstimate the angle of the shackle and the location of the hole - worked great for me.)
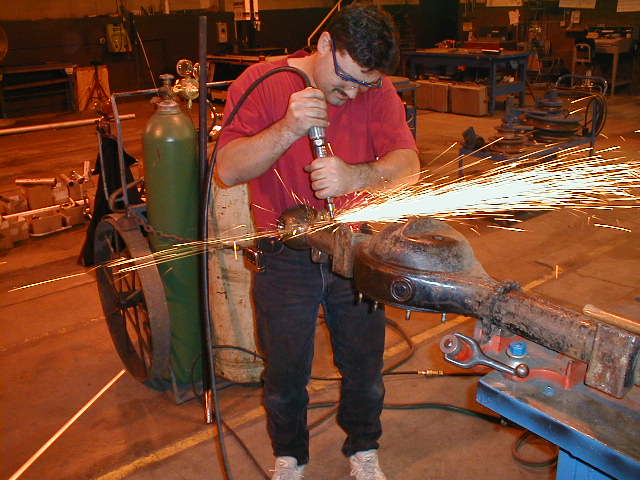
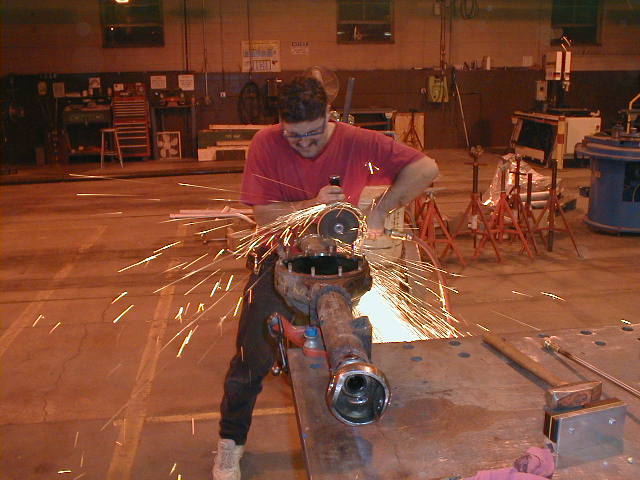
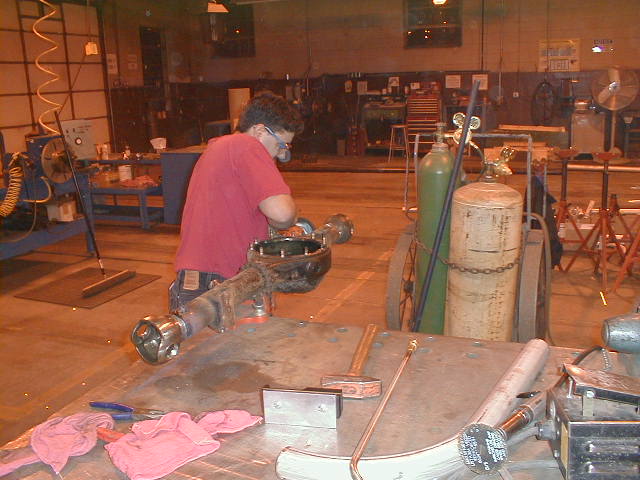
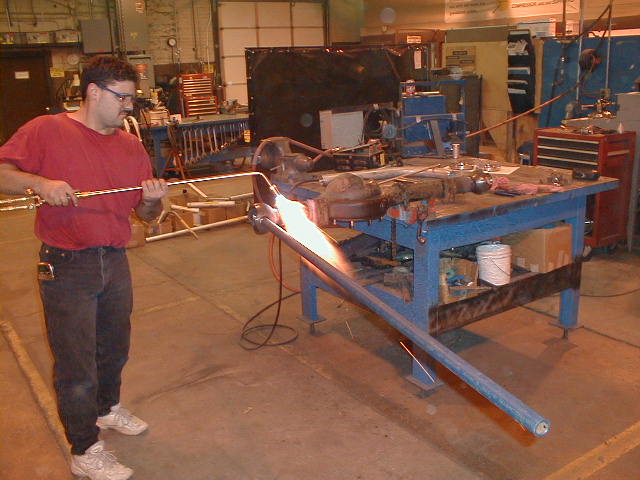
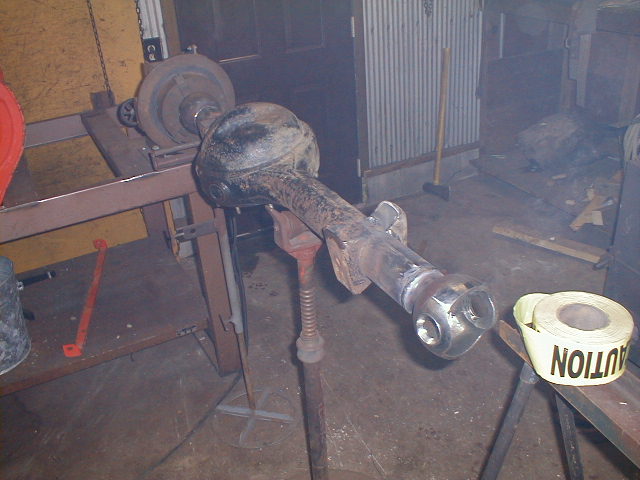
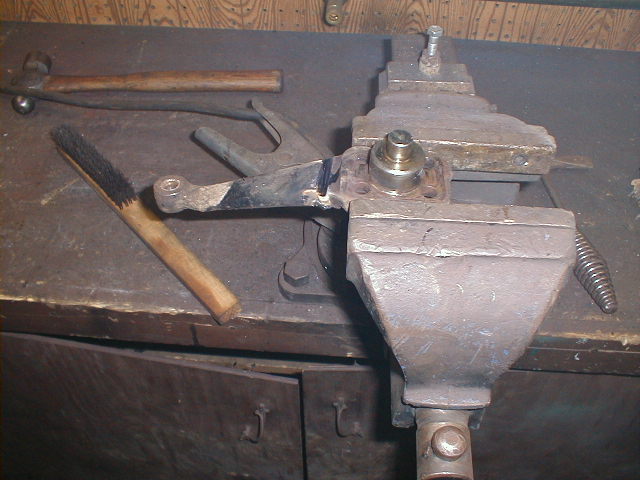
Now for the axle work...this actually ran a few nights to get it done to my liking. First step was to COMPLETELY disassemble the front axle.....EVERYTHING must be off, including brake lines. Remove the steering stops and the shock mounts. Now comes the fun part....grinding out the knuckle welds and turning them....mine were stubborn and required LOTS of heat, as you can see in the photos above. This may be something you'll need to have farmed out, but you may be lucky and have the tools. We initially guessed at what we needed in the shop, and then kept coming back for test fits to be sure. (Have your perches available for the test fits...the pumpkin-side perch will need some grinding/modifying to get it to fit correctly.) Again, test fit with the weight of the truck on the springs. Test fit, align everything up, re-adjust as necessary, test fit again, tack weld, re-check, re-check....the critical items is making sure both knuckles are turned equally. If they aren't you can end up with some funky steering, strange tracking, and possibly some mechanical problems. You just can't take enough time on this part. (My front pinion points directly at the transfer case - again, this may necessitate a double-cardan shaft at the transfer case end. I did not do the double-cardan, since my front drive line is only engaged during slow-speed use and the vibrations are not as much a concern then.)
Once you are thoroughly happy with the amount of turning, the angle of both sides, and the placement of the perches, it's time to weld. Again, small short stitches and watch the heat. You can now go thru the process of reassembling the axle, replacing anything that's worn. Mine got complete knuckle rebuilds including new kingpin bearings and new lockouts. Re-weld the steering stops in place and relocate the shock mounts...I located my shock mounts slightly further inwards to prevent contact with the steering arms at extreme flex.
Reinstall the axle under the truck with new u-bolts and a new longer brake hose. I actually had to run a double hose with the amount of droop my truck can achieve.
Your final measurement will be for the front driveshaft. Using a high-lift, jack the truck up until both front tires are off the ground (Be careful to hot let it tip over....been there, done that....) Measure the flange-to-flange distance. Now lower the truck and measure. Figure on at least 2" for compression and total your work. Mine came to over 7 inches....meaning I was gonna need a long-travel custom shaft. (Stock FJ40 shafts have maybe 4 inches of useable travel) Unfortunately, custom shafts are not cheap, like $375 each. Keep this in mind if you shoot for extreme travel. Also, you will likely need custom shock towers to fit your new super-long shocks. There are some from a Ford HD truck that work and are available new. I made custom mounts for mine and am quite pleased with them.
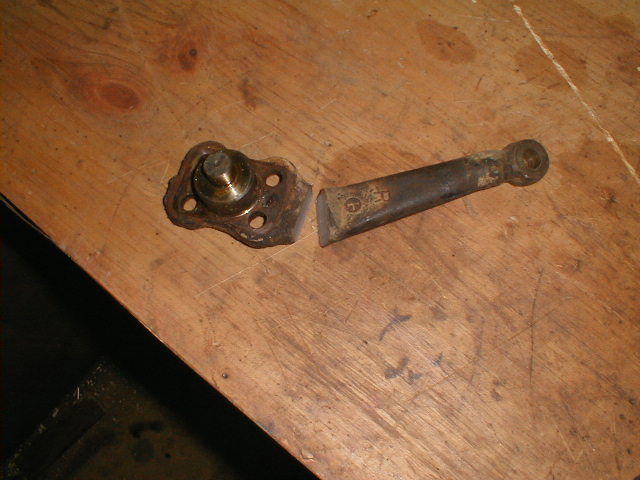
One thing I haven't addressed is steering. You can expect your stock steering to require replacement to either GM Saginaw or Scout Saginaw. I had the Scout setup installed, and experienced some rubbing on the pitman arm on extreme compression. A different arm and a bump stop has controlled most of this. Also, you will need to address the tie rod and drag link on the passenger side. Custom double arms are available, as are custom high-steer arms. You can also make your own, just be forewarned that most DOT people will fail a welded steering arm.