Welded Carrier
Project completed January 2001 - UPDATED NOVEMBER 2001 - UPDATED AGAIN JANUARY 2003
You hear people discussion all the time the merits between lockers, limited slips, cable/air lockers, and spools/welded carriers. Since my FJ40 is used about 95+% of the time on the trail and gets trailered to/from the trail, a spool or welded carrier is perfect for my rear axle. I opted to try this on my truck for a couple reasons - first, my exisitng EZ-Lock was beginning to bang and make more noise. A previous rebuild of the unit (replacing the springs) didn't seem to help. My guess is the side shims were worn, and if I was gonna tear in there, I may as well install something tougher than the EZ-Lock anyways. Second, the cost for a Detroit or ARB or cable setup was a tad much for me. If the welded doesn't work for whatever reason, I can always change it back or purchase something else.
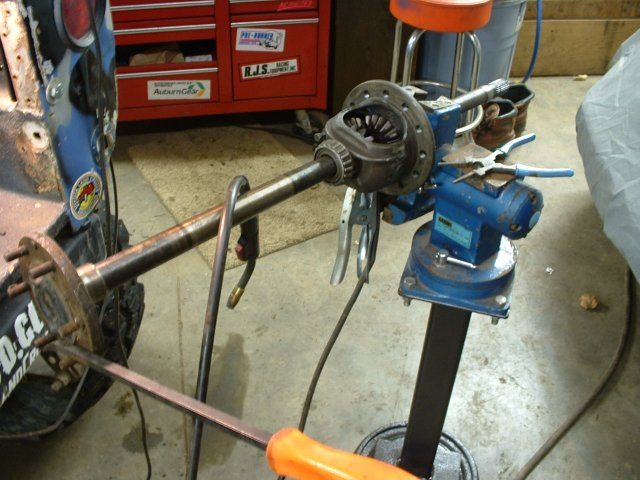
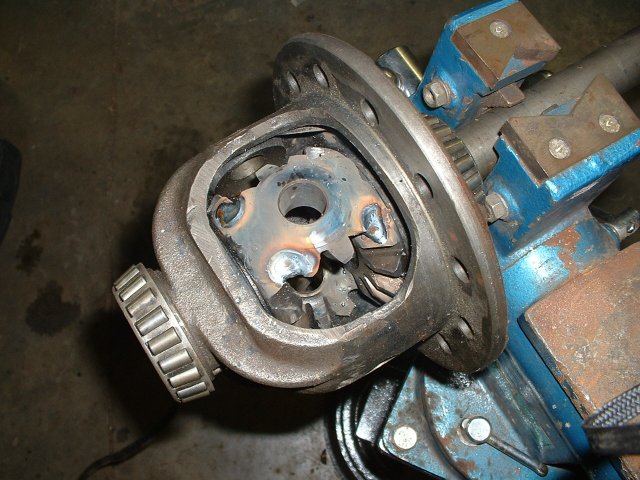
 This is the shot before anything got started. Taking the carrier out and removing the ring gear allows you better access to the areas to be welded. You do need to remove the cross pin in order to remove the ring. Make sure you then reinstall the cross pin before welding since this is what aligns everything. Also, I made marks on the side adjusters and on the ring gear to ensure everything was realigned the same way once I reinstalled it. Changing the pattern between the ring and pinion is a good way to wreck things in a hurry. A simple center punch will suffice. Also, I was careful to keep everything orientated so the same bearing matched the same race, etc.
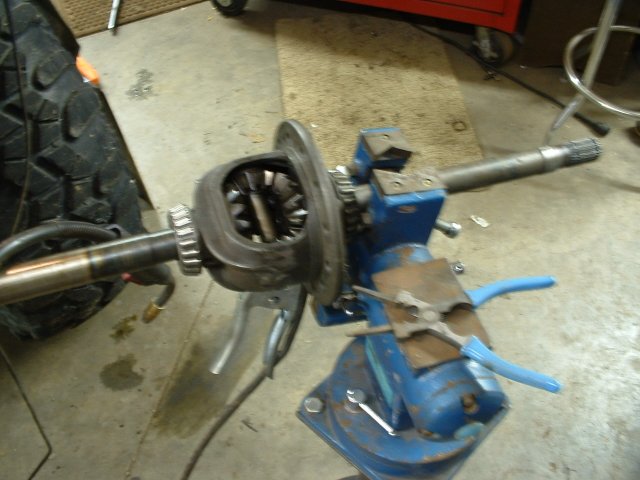
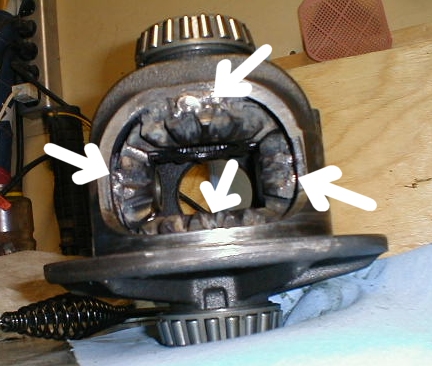 This photo shows the 4 areas to weld. Unlike some other carriers, there is no space to be filled, so you don't have to worry about adding strap metal anywheres to fill in gaps. I used a 1/4 inch 6011 welding rod and set it quite hot. Penetration is key for this to hold over the long term. This photo was tanen before I completed much of the fill work to smooth out things. Another critical part is making sure you've got all the spatter and slag removed. I spent a good 20 minutes with a small wire brush and a pick making sure all that loose material would stay in there and have a fit with my bearings. (Welding with a wire feed and shielding gas will help avoid much of this problem.)
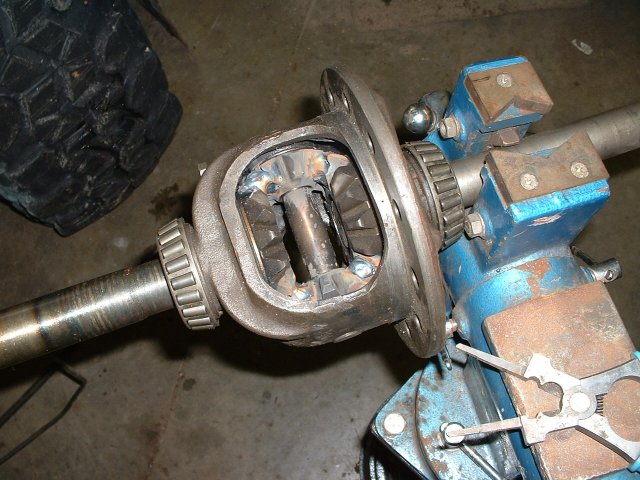
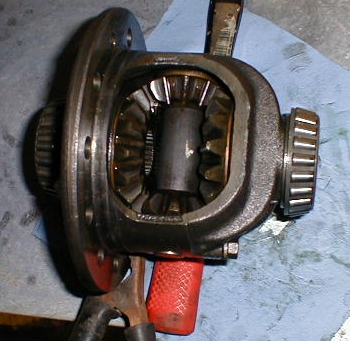
 And now the reinstall photo. Not much to this, beyond taking your time and making sure everything is torqued up properly. Also make sure things are realigned and orientated exactly the same way they came apart.
I'll have this installed in the rear of my FJ40 in the next few weeks and will have better impressions of how I like it by mid-summer. I don't forsee any problems, but ya just never know.
UPDATED!!
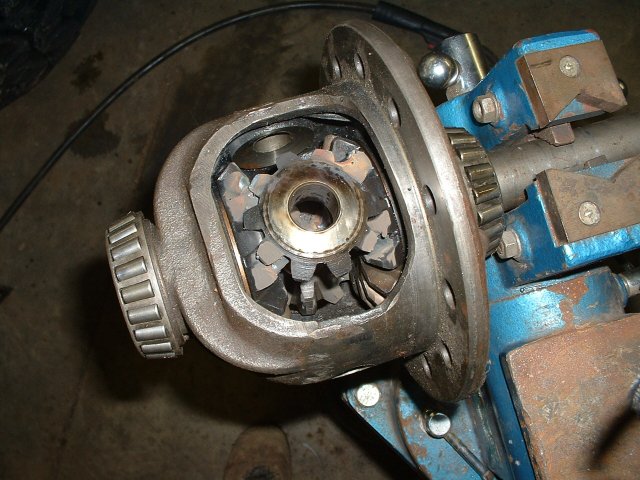
The weld between the side gears and the case did not hold up....a discussion with a friend netted a more effective method, and one which does not destroy your case as well. Pics are similar to above...
Basically, you weld it 8 times, at every point where the spiders meet the side gears.
Make sure you have the washers and center block in place during each weld process. Bench assemble, making sure the side gears are properly set out and aren't leaving slop between the washer and the case. Weld the 4 points. Now, remove the crosspin and center block, rotate the inner asembly on the side gear axis 108 degrees, reinstall the crosspin and center block (and the two spider washers that likely fell out) and weld those 4 points as well. Take a pencil grinder and remove just enough weld to allow you to remove the center block.
viola....now, spend some time chipping and cleaning...weld spatter is not the best for bearings...
UPDATED AGAIN!! Pics only this time....